November 2020
#4 – Shadow Business
by Martin Menzel

The story of implementing shadows for Knights of Frontier Valley began in February 2018. Since then, up until this month, it had been an on-and-off effort, and I’m glad it’s finally done – here is how it came together.
To be honest, I have spent way too much time (and budget) on creating shadows for this game, far beyond what would be justified for such a feature. In my previous career, Elon Musk once mentioned to me that “Perfect must not be the enemy of Good”, and as so often, he was right. Trying to over-engineer a feature is usually a recipe for failure.
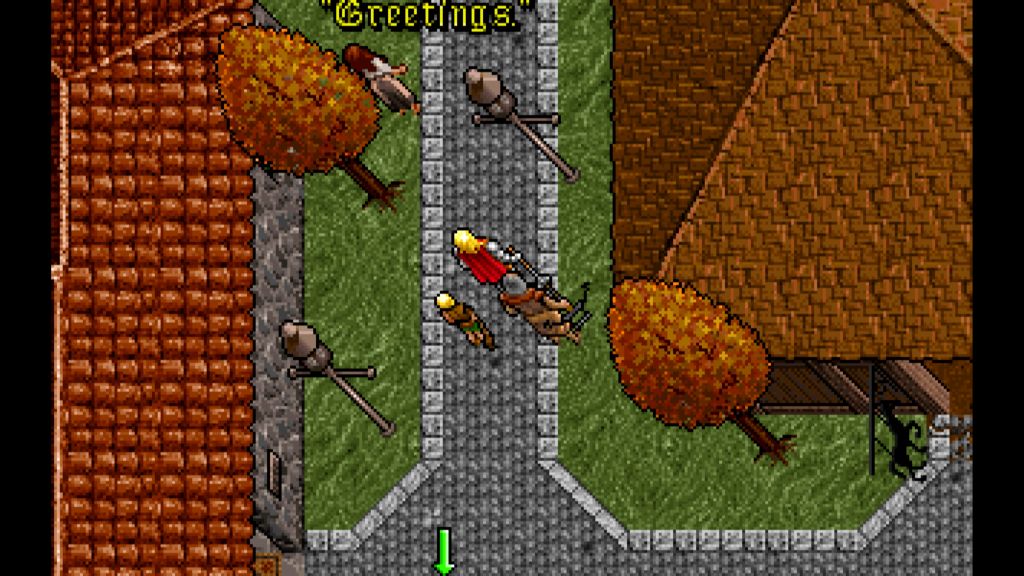
If you have watched some of the game’s videos, you might have noticed something to be missing at the time they were recorded: character shadows. Shadows add subtle depth to a scene, and while some games look just fine without them, Knights of Frontier Valley does not; it seems to be a matter of camera angle, color palette and art style.
Knight of Frontier Valley’s engine, including all rendering, is written from scratch, so when I started working on shadows, I thought about the different ways how they could be done for animated characters. Three options came to mind:
1) The simple solution: Shadows could be made to always be just some abstract, dark-ish fuzzball underneath the characters. This would be easy to do, as it would not create any expectation of details, and, therefore, the shadow would not have to change when the character changed. An abstract blob can remain an abstract blob, no matter if the character’s arm is stretched out to deliver a sword blow or not. As simple as it would have been, this option quickly became a no-go after testing a quick prototype. It didn’t fit to the art style at all and really looked awful, and I saw little room for improvement.
2) Then there was a static solution with detailed shadows: As laid out here, character animations are all pre-rendered in this game, so it would have been possible to include shadows in those frame renders. However, I chose not to go this route for two reasons: First, spritesheets were already taking up more RAM than I was comfortable with, and I was not interested in making it worse by adding more content to each of the hundreds of thousands of frames. And second, I was aiming for a system where the direction and length of a shadow could be based on the position of the light source, which wouldn’t work with pre-rendered shadows.
3) Finally, there was the detailed and dynamic solution: With this approach, shadows would be dynamically generated frame-by-frame at runtime. This would arguably be the best looking and most flexible implementation, but probably also the most challenging one.
My goal was to have long shadows pointing westwards in the morning, short shadows underneath the characters around noon, and long shadows again in the evening, this time pointing eastwards. Indoors or at night, shadows should be cast in a direction that depended on where the light source would be located in the particular environment. This goal could only be achieved with dynamic shadows (option #3), so I started working on it. In retrospect, I probably should have done a bit more research; but regardless, if I had to do it all over, I would choose this option again and just skip the mistakes I made.
The biggest of those mistakes was that for too long, I wanted shadows to go downwards on the screen, as it looked more interesting than going upwards. In advertising, clocks are regularly shown with the time set to 10 minutes past 10 o’clock, because with that specific angle between the arms, clocks look most interesting. Similarly, if the angle between character and its shadow was too small (both pointing upwards), it would not have the same visual effect. The problem with that angle, however, was that a shadow (which was basically a darkened copy of the character’s image, rotated around the feet to point downwards), also needed to be mirrored, or the sword hand would be where the shield hand should be in the shadow. It wasn’t noticeable that the frame was mirrored while the character was standing still and upright, but problems started showing up once he moved or switched to a stance where the feet were no longer closely kept together. For example, if the character moved one if his legs forward while facing up (north), the shadow should follow that motion, staying somewhat close to the leg. But instead, when mirrored, it did the opposite and moved away from the foot, which was so obviously wrong that without making some adjustments, it was a showstopper.
There was no straightforward solution for this issue, but I wasn’t ready to give up on the more interesting shadow direction just yet. So I started working on a shader which did the groundwork of mirroring, rotating, and tinting the shadow as well as making it semi-transparent, and then did apply some adjustments to compensate for mentioned mirroring issues. Those adjustments were the tricky part. After some failed attempts, I sought council from a math wiz, and together we came up with this ridiculously complicated system of adjustments which sort of worked in some scenarios, but didn’t work in a number of others. It could be that when the character was walking eastwards, everything looked right, but westwards it was all wrong, and the nature of the issue might be changing from frame to frame, making any workable adjustment short-lived.
For flat characters (like snakes), quadpedal characters (like horses), or just for any animation where the character didn’t stay upright (sitting down, dying, etc), the system didn’t really work either.
In a 2D-engine, without the third dimension of height, there just wasn’t enough information to get this right. It was impossible to detect from the frame’s art when the character’s foot was elevated, or which pixels even constituted “the foot”. Without that info, there was no way to make reasonable adjustments in order to compensate for the issues.
It had been an honest attempt and a good learning experience, but after quite some time and frustration I had to accept reality and settle for an upwards direction of the shadow which wouldn’t require frame mirroring. Without the mirroring, there was no need anymore for the complicated logic I had started to put in place trying to compensate for mirroring issues. So I threw everything out and switched from implementing shadows via a shader to just creating a separate shadow sprite by copying the character frame and applying a distortion and some coloring to it.
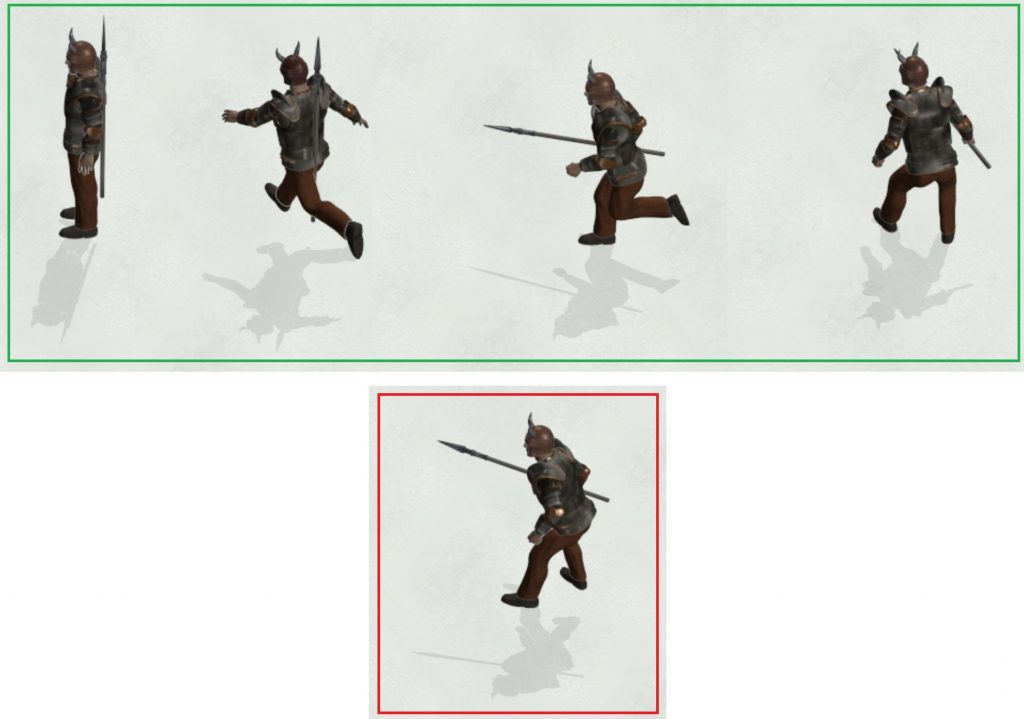
With the new mechanism, I was going to shear the shadow sprite instead of rotating it towards its intended angle. Shearing is an affine transformation that shifts pixels along the x or y axis based on the distance from a baseline. That was much better than rotating, which caused a disconnect between the character’s and the shadow’s feet. Shadows also looked more realistic (flatter) when sheared.
I also found a way to make it look right in animations where the character was not remaining upright: by reducing the shearing effect frame by frame, the shadow would move closer and closer towards the character, until it disappeared almost completely behind him, which was just right when the character was falling to the ground.
(continued on top of the right column)
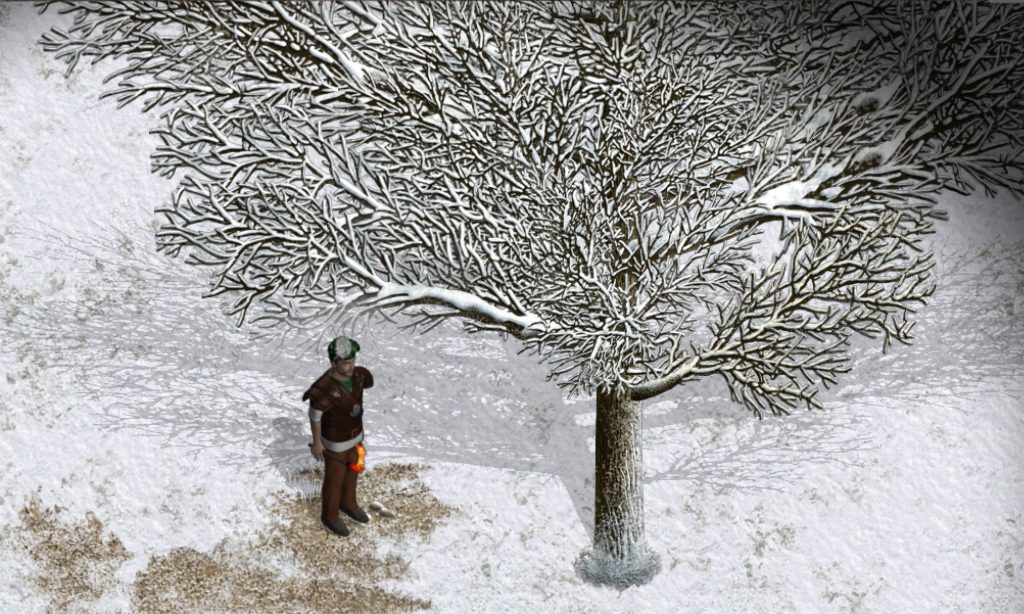
Once I had the new system coded up for the main character, I also wanted to try it for the recently added “modular trees”. Those trees were assembled dynamically from a number of possible trunks, branches and tops, and some were further transformed (e.g., mirrored). This way, a sheer endless number of tree variations could be produced from a relatively small set of components. Dmitriy did a fantastic job drawing those components, but the system made creating shadows complicated, and up to then I had planned to only use a fixed shadow image, which happened to be quite boring.
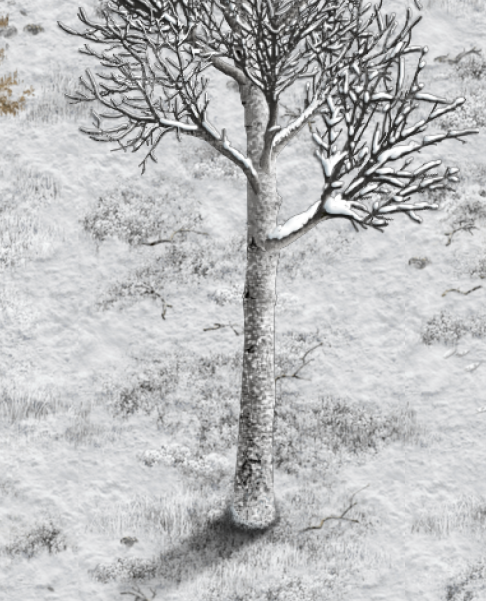
Modular trees were ideal candidates for generating shadows automatically, and it really worked well; suddenly scenes with characters and trees looked a lot more interesting.
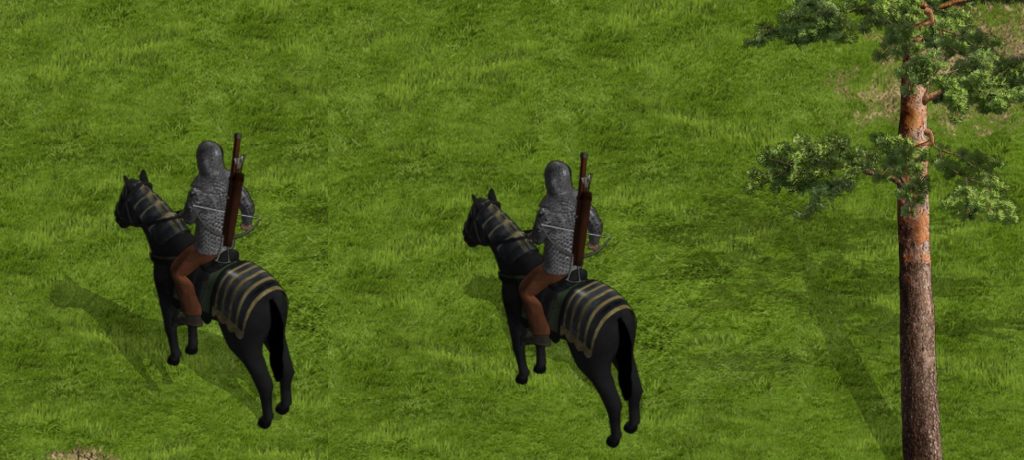
At last, things started looking great, and I was beginning to get excited about shadows again. That is, until I noticed a big problem with the shearing; a problem that just didn’t show at all with the main (human) character or with trees, but clearly showed for other objects: sheared shadows looked great for thin and upright bodies (like people or tree trunks), but did not work well for characters or objects with a larger ground footprint. The pixel shifting was incorrect when parts of the object were still on the ground higher up on the screen. A quadpedal character’s second set of legs (the two legs higher up on the screen) also got sheared away from the corresponding feet, which was wrong.
While it was possible to make custom adjustments to fix this issue for most quadpedal characters, the “shearing displacement” effect increased with object size, and completely disqualified larger objects like buildings from using this mechanism. Which meant that those shadows had to be made by an artists in a fixed direction, which put the whole idea of changing shadow directions by time of day finally to rest, for good.
R.I.P.!
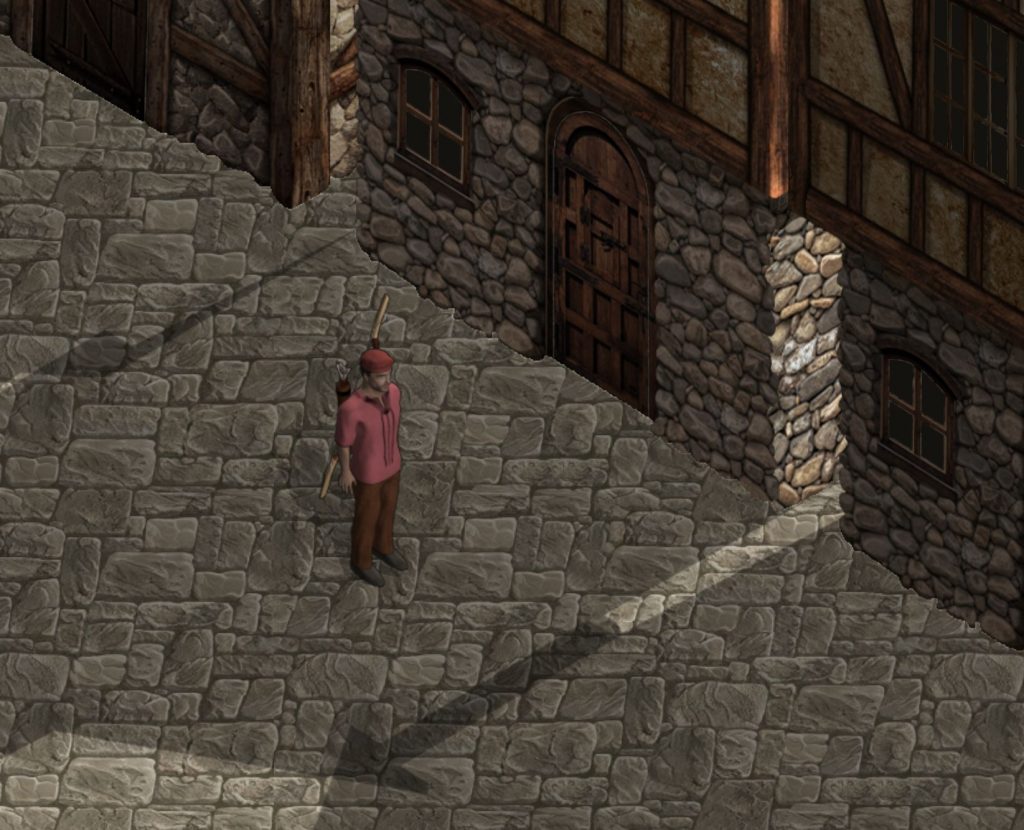
After that was settled, a few more issues came up. Turns out you really don’t want shadows to add up by too much. Adding up by a bit is ok, and actually adds to the depth of the scene – if all shadows would always have the same intensity and never added up, a character standing in the shade of a large building really didn’t have a shadow anymore, as it would be swallowed by the building’s shadow. But adding up shadows for several objects with no limit can make the overlapping areas become quite dark, too dark for it to look real.
To fix this issue, shadows needed to have a maximum darkness. OpenGL offers a way of blending layers which is perfectly suited for this purpose (max alpha); unfortunately, in the framework I am using (libGDX) this blending option only becomes available when switching to a higher version of the included OGL library, which is labeled “experimental”. And it is so for good reason: using the experimental version made GPU usage increase by up to 160% with no other changes made, and also caused some weird rendering issues. So this was not an option.
The solution I came up with works like this: By rendering all building shadows solid black into a separate off-screen layer (FBO), and then reducing this layer’s alpha (opacity) as a whole, all building shadows had the same intensity even where they overlapped. Character shadows were drawn separately over this layer, so they showed darker and remained visible within a building’s shadow. This approach turned out to be a bit complex because the building shadow layer’s size could neither be measured in game world units nor in screen pixels (like everything else), but needed to have the internal size of the visible map. This meant projection to a new coordinate system was needed. FBOs are also known for taking up some performance, but according to my frame rate tests it seemed to be negligible.
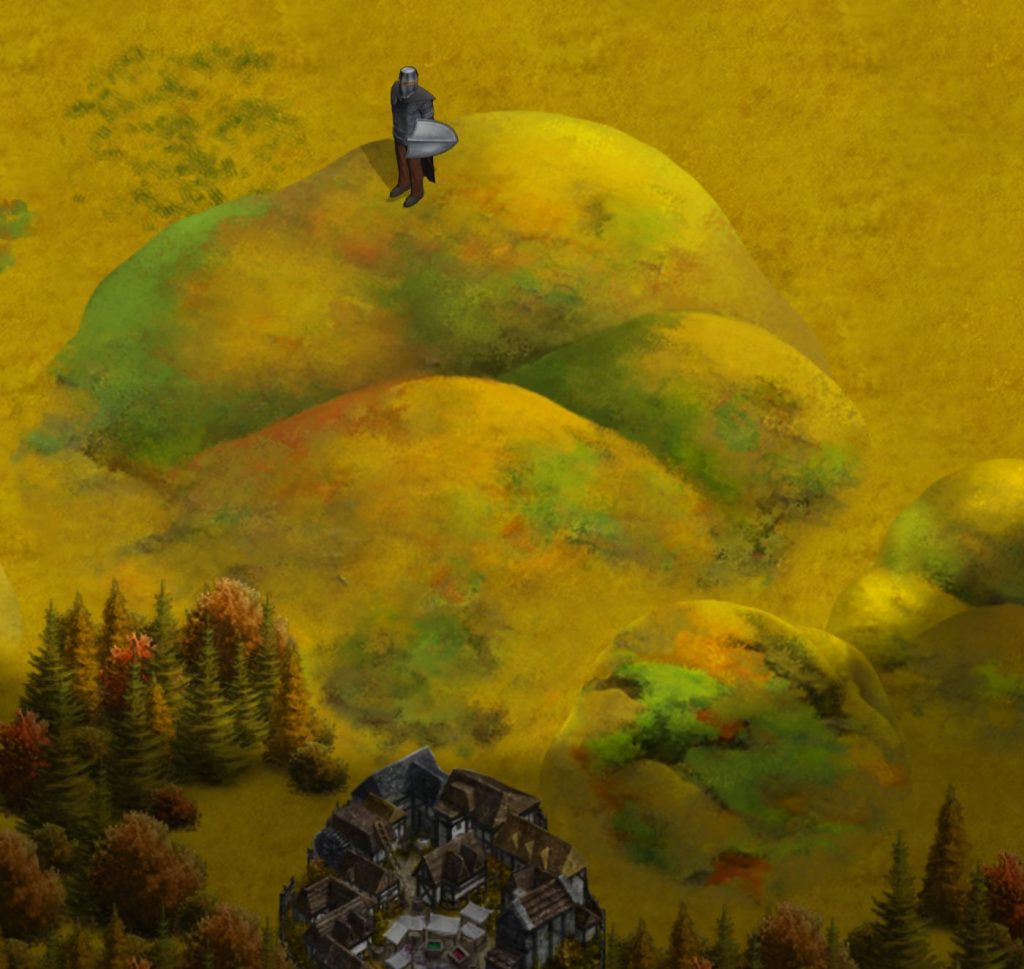
And finally, there was yet another problem that needed to be addressed: shadows on hilltops. As it was, character shadows extended into the air when standing on top of a hill. The shadows needed to be clipped (masked for the hill’s shape), and their positions adjusted when walking up and down the hill. This required another mix of FBO and blending fun, but it worked.
Shadows for mountains and forests on the world map, as well as those for random item stacks are generated in yet more different ways, but it’s rather simple… for the first, fixed assets are being assembled to the right shape, and for the latter, a pixmap of the item stack is simply being extended by a few dark pixels during the dynamic generation of the stack’s visualization.
All that is left to do at this point is creating all the fixed shadow images for large objects and buildings that cannot be sheared, which is “just work”.
Being able to finally close this chapter has been something of a relief. In fact, it allows me to finally declare a belated “Engine Complete!”, although the game is in a more advanced state than this label would suggest.
Cheers,
Martin